")


Hello loves!
Hope you’re all doing okay and enjoying the slow onset of Spring! I’m personally loving the longer days and the milder weather – plenty more opportunity to get outside while it’s light!
I’m absolutely thrilled to say that after a few months of intermittent stock levels that we are back fully stocked and sending out orders quickly again – thanks so much to Sally and Claire (taking turns) in the studio and keeping everything running smoothly. So please rest assured that we no longer have any delays and can whizz your orders out in a matter of days (or hours if Sally has anything to do with it!!)
A huge thank you for all your patience, it’s been a really challenging time and we so appreciate all your support xx
So – onto this week’s blog post. Bookmark this one because it’s a really handy one to refer to when you’re doing that thing that most of our customers like the least – sewing up your cardigan or jumper!! (personally I love this bit, I get in the zen zone, but no word of a lie, we’ve got LAD’s on the facebook group who hate it so much that they’d rather start knitting a new cardigan instead of sewing their current one up :p)
It's a Stitch-up
Unless you’re knitting on circular needles, or your design advises otherwise, one thing all our patterns have in common is that you’ll have to sew the pieces together when you’ve finished knitting. Each knitted element becomes attached to another element to form the shoulder seam, the arm hole and the side seam.
We try and explain as best we can how to achieve this in each of our patterns, but there are definitely some tips we can give you to make it as straightforward and successful as possible!
The first hurdle for some of you is how to lay out your pieces, and which order to sew them up in, so Chloe has created some brilliant illustrations to highlight exactly what you need to do 👌
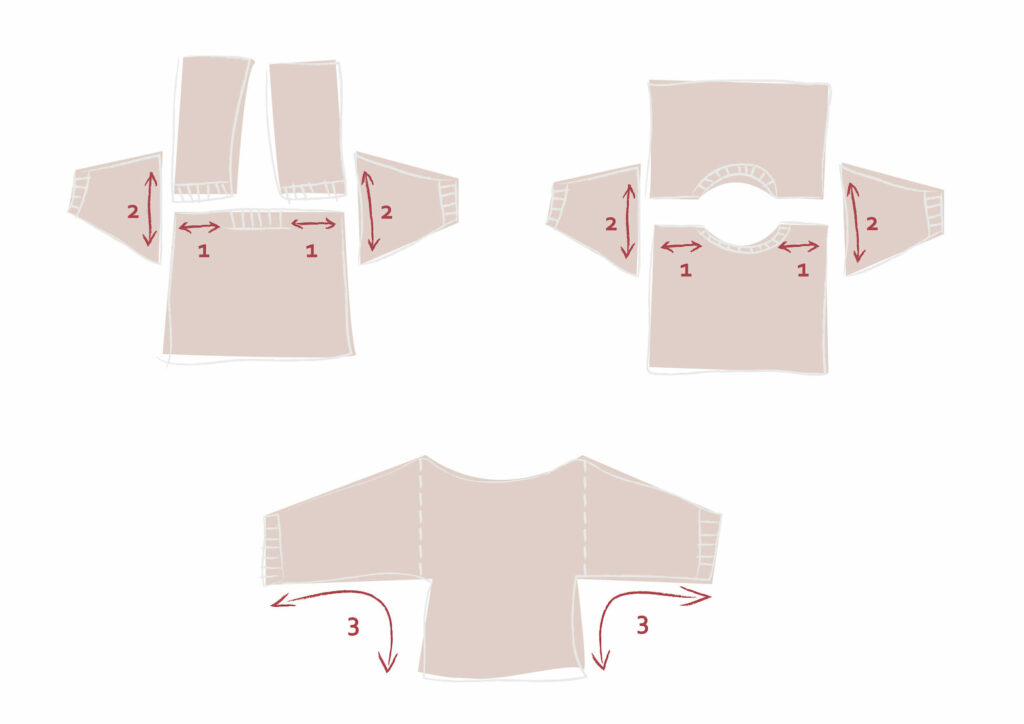
You’ll want all your pieces facing right side up (that is – you want to see the knitted side, rather than the purled side). It may feel wrong, but the way Mattress Stitch works is that you are creating a seam on the wrong side by sewing on the right side.
Lay them out as the illustration shows above, whether you’re sewing up a cardigan or a jumper, and start with step 1 – the shoulder seams.
1. Shoulder Seams
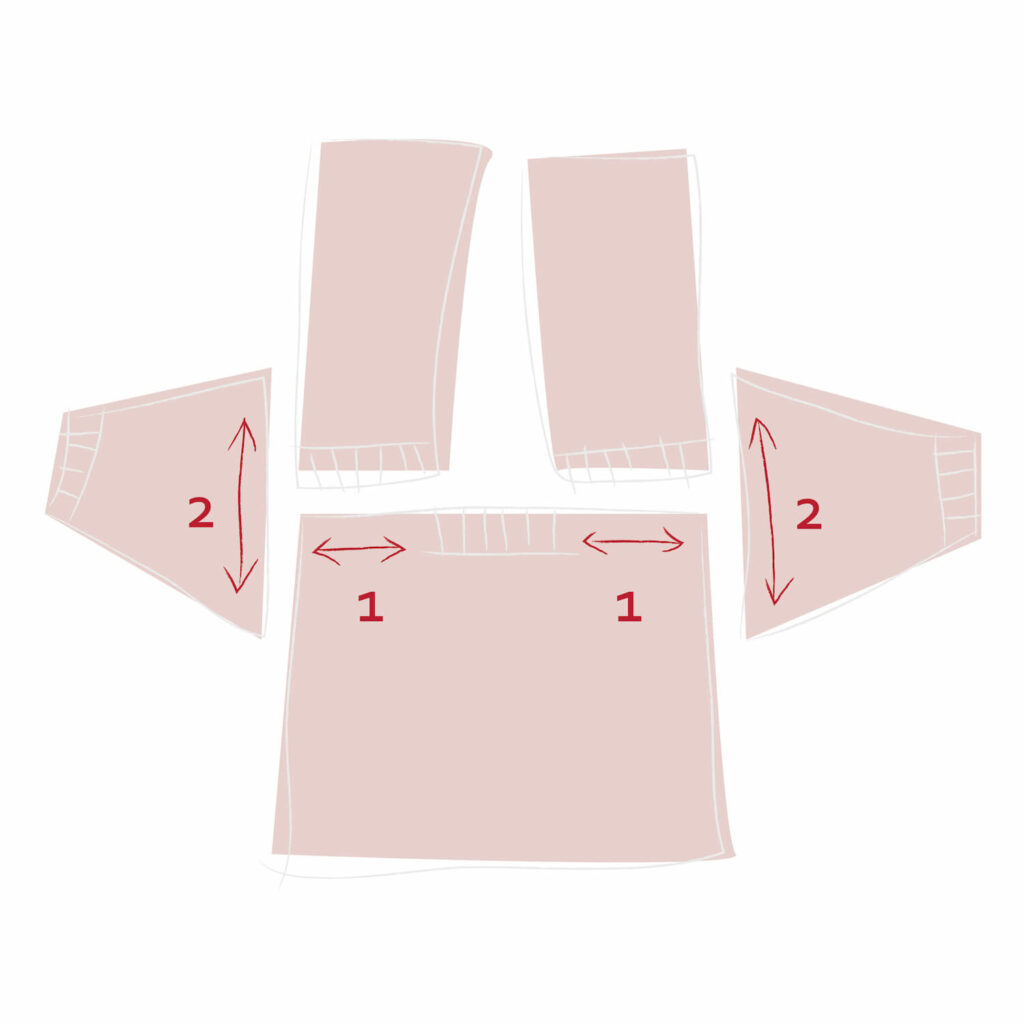
The first element on your jumper or cardigan is to sew up the shoulder seam. This is where the front and the back sections meet to create the seam that will follow from your neck to your shoulder.
You are stitching each ‘v’ of the knit stitches along and hooking your needle underneath both parts of the ‘v’ on either side. Alternate between one ‘v’ on the front, and one ‘v’ on the back, going back on yourself to thread in where you previously pulled through. When you then pull the thread tight, there will be a neat join where the ‘v’s’ follow each other from front to back. This is probably the most straightforward bit of mattress stitching in the garment as it’s easy to see where you are sewing because the panels match.
2. Attaching Arms
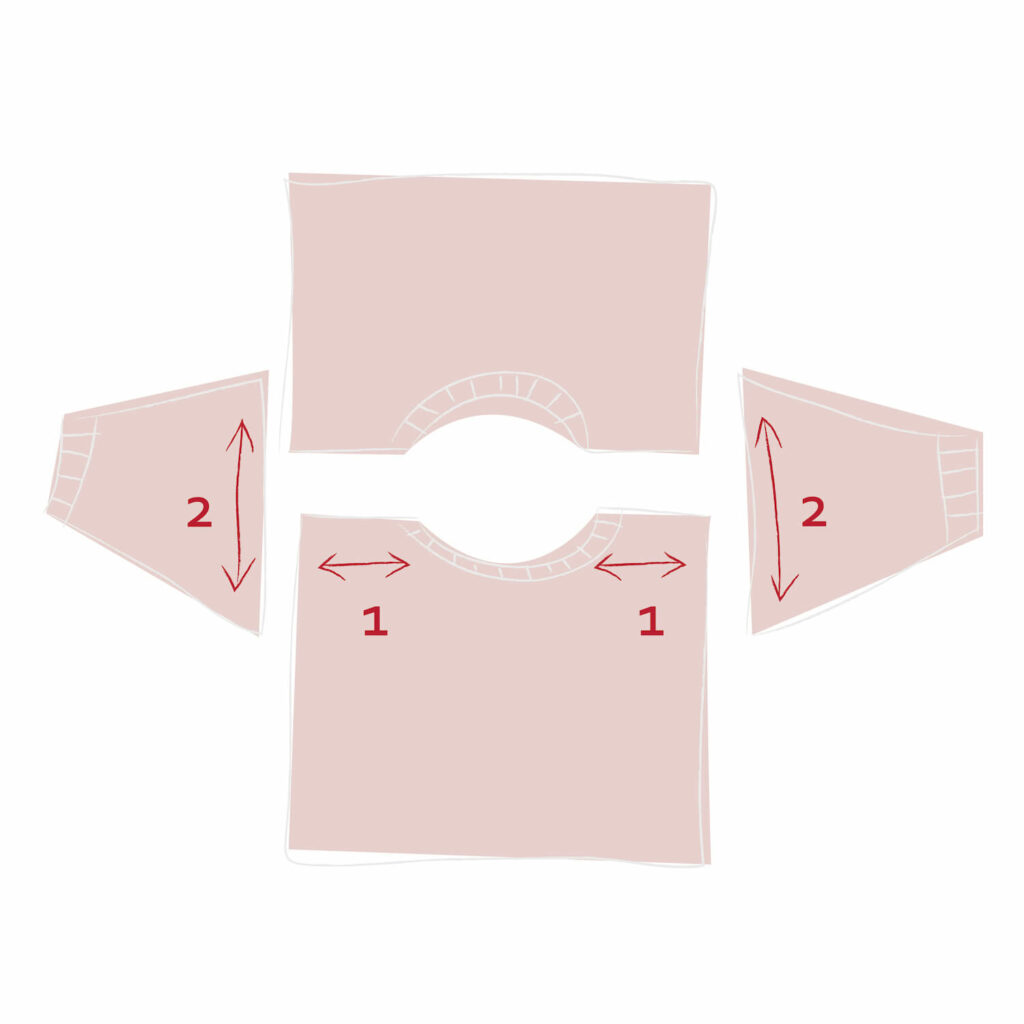
The next part of sewing up (number 2 on the image above) is attaching the sleeves to the body. This is probably the trickiest part, as going wrong here really does affect the wearability of the garment. Sew up too tight and you’ll struggle to get your arms through the hole, sew up too loose and the proportions will be off.
'V' & 'Bar'
When explaining how to attach sleeves to the body, I differentiate between both parts of the garment by describing the sleeve stitches as ‘v’ stitches, and the stitches you’ll be sewing through on the body as ‘bar’ stitches. The ‘bars’ are at the top and the bottom of the body stitch, whereas the ‘v’ is the full stitch on the sleeve.
One error a lot of knitters make is sewing the sleeves up too tight, and this normally happens when the sleeve ‘v’ stitch is wider than the ‘bar’ stitch you are picking up. The ‘v’ stitches then become tighter and it results in the sleeves being sewn in a lot smaller than necessary.
As you can see on the video above, Lauren is picking up the two parts of the ‘v’ stitch, with one ‘bar’ from the body stitch. Because Lauren is a loose knitter, this means the bars are wider apart. However we do tend to find that if you can pick up 2 bars every other stitch, this will help to space the sleeve out better.
I have been known to sew: 1 x v, 2 x bar, 1 x v, 2 x bar, 1 x v, 1 x bar (repeat until end) but for ease, alternating 1 x bar, then 2 x bar for each v stitch is a good way to balance it out.
One other thing to be aware of, is matching the front and the back of the sleeve to the front and the back of the garment. This is why we suggest starting sewing at the centre shoulder seam (leaving a long strand to complete the second side) – this means that you’re starting at the same point on both the front and the back, and then you follow the same v/bar system, meaning you’ll end up in the same place (hopefully!) on the front and the back.
You can easily find the centre part of the arm edge by counting the knitted stitches and halving.
This does sound a lot more complicated than it is when you’re sewing up and I absolutely don’t want to scare you, it’s really not that tricky! Ultimately, you’re trying to spread the arm out along the body so it doesn’t feel tight when you put on the finished piece.
3. Underside of Arms & Side Seams
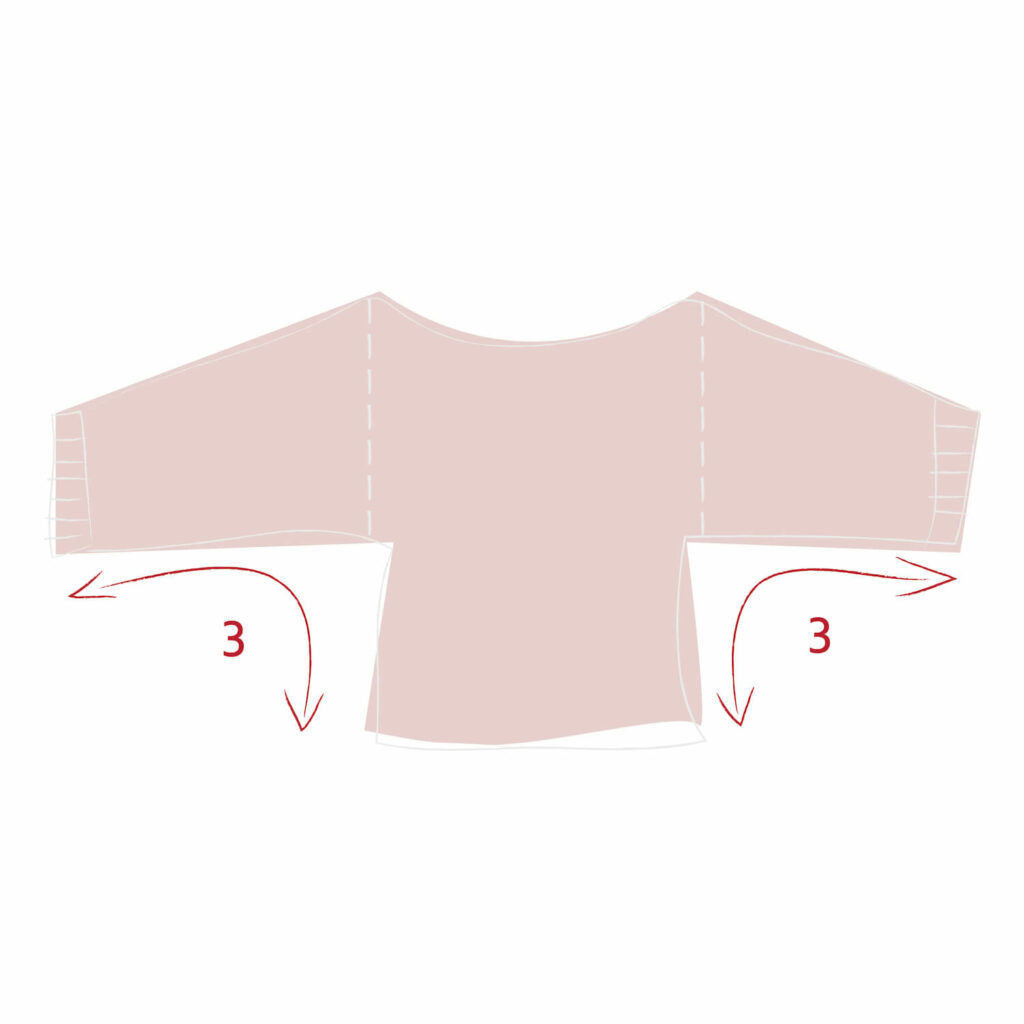
Once you’ve achieved the arm attaching to the body, you’re on the home straight! All you need to do now is to sew up from the cuff of the arm, along to the armpit and then down to the bottom rib.
You have a choice of starting from one of the two end points (cuff or bottom rib) or I tend to start in the armpit to make sure I properly match up the seams. Either way, this is picking up ‘bars’ rather than ‘v’ stitches due to the direction of the knitting. Depending on the looseness/tightness of the knitting you can either pick up one bar at a time or two. See the video below…
And that's it! You've got it all sewn up 👍
You’ll use the same methods when sewing up anything from the mini mohair knits to the cushions and even the jumbo knits.
One piece of advice I’ll give – there is never any rush, always take your time when sewing up, it’s so much better to be slow and accurate than hurrying along and making a silly mistake. And once you’ve got the hang of it, you’ll end up like me and actually look forward to the sewing up part…!
I really hope it’s been of use – I’d love to hear your thoughts and some of your experience in sewing up your knits – you can’t all hate it, right?!!
Until the next time,


